Do you have a piece of funiture that doesn't look quite the way you would like it to look? Update it or personalize it by painting it a fun color! Finsih it off with a nice drybrush technique that will give it some personality. Drybrushing is an easy painting tecnique that creates some depth and gives the peice of furniture an aged look without sanding. Sanding can sometimes damage the furniture so drybrushing is a better alternative.
How to drybrush-
After you sanded, primed and painted the base color on your furniture, choose a color such as burnt umber, black or any natural toned dark paint. When I say natural tone, I mean a color that would be an earthtone but it should be rather dark. To get an aged look on furniture you are more or less trying to make it look worn and somewhat "dirty". Therefore the colors must be in line with what the natural process would do.
After you have chosen your drybrush color, take a large brush, 4 inches or so and rough up the ends. The best way to do this is by pounding it into your driveway or any rough surface. Crazy I know! But it will give you the best result. You know it is "beat up" enough when you see fattening of the bristles at the end of the brush. Next grab a couple paper plates and we are ready to paint!
Dip the end of your brush into your paint. You only need a small amount of paint so it may be easier to put a small puddle of paint on a paper plate instead of dipping into the can. Next, wipe off most of the paint that is on your brush by swiping back and forth on a paper plate.
You are now ready to apply the paint to the furniture. Beginning at one end, drag your brush across the surface. Be careful to do it lightly. You can always add more. Concentrate on the edges of the furniture and the raised surfaces. Always go with the grain of the wood. Continue the process until the surface has the effect that you are trying to achieve. If you find that the drybrushing finish is heavier than you would like it to be, simply take your base coat color and drybrush with that color over the darker one. (Using a bit more paint.)
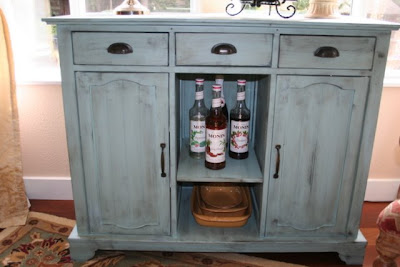
You now have a custom piece of furniture that you can enjoy for years to come!
If you have any projects that you have done, I would LOVE to see them and post them for others to see as well!


